


Three ways to Freedom
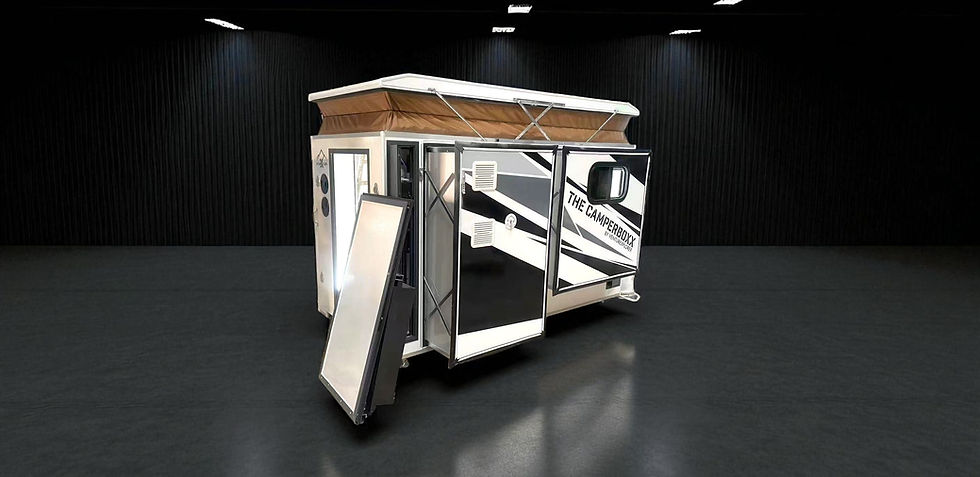
One pod, three setups. Use it in a van, mount it on a trailer, or place it as a standalone unit. Built to be portable, flexible, and ready wherever your adventures take you.


.jpg)
Swap. Upgrade. Repeat.
We built this pod to be modular because everything should be replaceable, upgradeable, and built to last. The goal is simple: outlast your van, outlast your trailer, and keep going as long as you do. With removable slide-out compartments, the floorplan is never locked in. Want a mobile office? We can design it. Need a salon on wheels? Done. Or if you’re the jack-of-all-trades type, just swap the slides whenever your lifestyle changes. One pod, endless possibilities.
How it Works
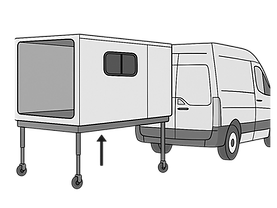
Using the pod is as straightforward as it sounds. Jack it up, line it with the rear platform of your cargo area, slide it in, and strap it down. Can it be done solo? Possibly, depending on your strength, though two people are preferred. Another option is to leave the pod in place and back your van or trailer up to it. You can also install a winch for extra help — there are multiple methods that work.
The main question to ask yourself is how often you plan to take the pod in and out. If it’s often, we recommend upgrading to the electric jack system, which lifts the pod with the push of a button. If it’s staying put long-term, the standard manual hand crank jack is usually enough. Reach out to us anytime for advice on which setup is best for your needs.
Step-by-step
Step 1
Position the Pod

Step 2
Lift to Cargo Height
Step 3
Slide into Place
Step 4
Secure the Pod
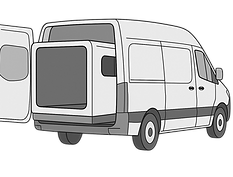
Park on level ground and set the brake. Line the pod with the cargo opening or trailer deck. You can either roll the pod to the vehicle or back the vehicle up to the pod—whichever gives better control. If using the track system, align the guide rails with the tracks mounted on the cargo floor so it feeds straight in. Keep casters at rolling height and check clearance at the doorway, roof, and sidewalls. Two people make it easier and safer, though solo loading is possible with care.
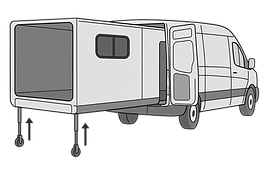
Raise the pod using the hand-crank jacks (or electric jacks if installed). Lift in small, even turns corner-to-corner to keep it level. Match the vehicle’s cargo-floor height, then lock the jacks and adjust the casters for a steady roll. If winching, attach the line to the anchor point now. Once the front guide rails rest on the cargo floor, raise the front legs again and swap the casters for flat jack stands to hold the frame securely.
With the height matched, guide the pod straight inside. Use the tracks to stay centered, keeping light pressure on both sides and pushing from the frame—not the fixtures. Go slow, watch pinch points, and stop every couple of feet to confirm clearance. If solo, a winch or come-along keeps the slide steady. Once you reach the rear legs, switch them to jack stands before pushing the rest of the way. Stop when the pod’s front face is seated tight to the bulkhead for best balance.
Tie down all four corners in a cross-strap pattern to the van or trailer D-rings. Lower all four legs so the pod settles firmly on the stands. Double-check each strap for even tension and confirm the pod is locked tight before driving. After your first 10–15 miles, pull over and recheck the straps to make sure nothing has shifted during transit.
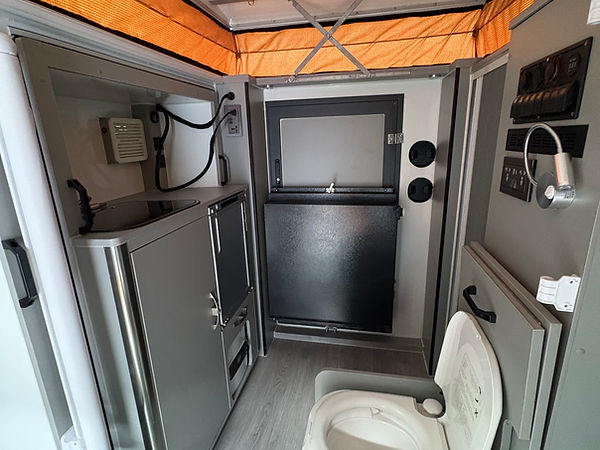
Floor Plan & Dimension


Bathroom
✅ Toilet with water flush
✅ Shower with built-in curtain
✅ Multipurpose shower head (indoor/outdoor use)
✅ Water heater (approx. 5 minutes)
✅ Water pump

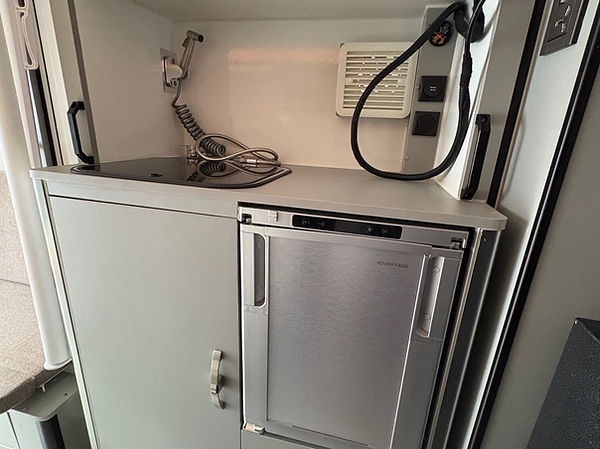
Kitchen
✅ Sink with hot/cold water
✅ Fresh water tank (22 gallons)
✅ Gray water tank (7 gallons)
✅ Water pump
✅ Water heater
✅ Mini fridge
✅ Extended hose for outdoor use
✅ Storage cabinet

Sleeping
✅ Convertible bed (seating to bed)
✅ Sleeps 2
✅ Extended bed accessory for users over 6 ft
✅ Slide window
✅ Privacy shade

Specifications
Builds
Features
Dimensions & Weight
-
Exterior Size (L × W × H):
-
Before extension: 110" × 51" × 68.5"
-
After extension (outdoors): 110" × 79" × 79"
-
-
Pod Weight (Empty): ~1,875 lbs
-
Maximum Load Capacity: ~1,100 lbs
-
Roof Expansion: Lift height depends on van roof clearance; can extend higher when used outdoors (e.g., trailer setup)
Structure & Access
-
Exterior: Fiberglass shell with waterproofing
-
Frame: Galvanized iron & steel reinforced structure
-
Insulation: 1" extruded polystyrene (fire-retardant B1 grade)
-
Doors: 3 total
-
Cab access hinged door: 55" H × 30" W
-
Side & Rear: 3-panel sliding, 58" H × 37" W
-
-
Door Sealing & Privacy: Rubber weather seals, privacy shades for side/rear doors, and interior privacy partition for bathroom vs. sleeping area
Mounting & Mobility
-
Lifting Options: Manual jack system included; electric jack upgrade available (requires shore power, not battery)
-
Support Legs: 4 adjustable, up to 35" lift height; includes jack stand accessory for secure swap-out
-
Rails: 24" seamless steel front slide-out rails
-
Floor Tracks: Sold separately in 10 ft, 12 ft, 16 ft, or custom lengths
-
Wheels: 2 types of casters — 3" standard (included), optional 5.9" all-terrain upgrade available
-
Tie-Down Points: 10 total (4 cab, 4 rear, 1 left, 1 right)
Plumbing & Water
-
Fresh Tank: 16 gal
-
Gray Tanks: 8 gal (sink)
-
Shower: Fold-down shower pan (11 gal capacity)
-
Pump: 12V self-priming, 7.5A
-
Sink: Stainless steel, 16" × 15"
-
Drainage Hose: 33 ft included
-
Toilet: Portable flush, 5.3 gal capacity with ventilation fan
-
Water Heater: 8L electric, 1,500W — heats in approx. 5–10 minutes
Electrical & Power
-
Shore Power: AC 110V input (required for jacks & appliances)
-
Optional Portable Power Box: 2,400W (12V/110V)
-
Optional Battery: LiFePO₄, 2,016Wh
-
Optional Solar: 450W (3 × 150W panels)
-
Outlets: 6 × 110V (wall), +4 (with portable box)
-
USB Ports: 3 wall +4 (optional), USB-C: 3 wall +2 (optional)
-
Lighting: LED interior & exterior
-
Appliance Draw (all systems): ~2,195W
Living & Sleeping
-
Bed/Dining Combo: Converts from dinette table into a bed extension
-
Bed Size: 41" W × 76" L — expandable to sleep users over 6 ft tall (sleeps 2 adults)
-
Storage Cabinet: 42" W × 14" H × 15" D
-
Ventilation: Roof fan for airflow & odor control
-
Privacy: Partition wall to divide bathroom and sleeping space
Kitchen & Appliances
-
Cooking: Portable gas stove (BYO fuel)
-
Refrigerator: 40–50L, ~60W
-
Water Heater: 8L, 1,500W (5–10 min warm-up)
-
Optional A/C: Cooling & heating system with 5.5" diameter exhaust port pre-installed for portable AC


Toilet
Shower
6 Gal Flushable
7.9 Gal Holding Tank

Sink
22.5 Fresh, 7.9 Gray
_edited_edited.png)


Lighting
Power Outlet
Power Station
Strip Lighting
3x 110v 1x 12v 2xUBB
2400w Power Station


Ventilation
Insulation
A/C Ready
1x Ventilation Fan, 2x Slide Door, 1x Window
Extruded Polystyrene Insulation
5.5 A/C Exhaust Hole


Access Door
Window
Solar
3x Access Door. (Cab, Side, Rear)
1x Window, 1x Skylight
Built-In Solar, Pre-Wired Connectors

Water Pump
Water Heater
Holding Tank
Self Priming Pump
Electric Water heater, 5 min heat up
Shower, Sink, Toilet

Table

Bed

Seating
Folding Table converts to bed extension
Convertible Bed from sofa
2x Seating area


Refrigerator
Stove
Storage
Built-In Mini Fridge
Portable Propane Stove
3x Storage Cabinet

Build Your Boxx
Ready to place your order? Be one of the first to own the CamperBoxx and lock in exclusive early-bird perks.
Early customers get free upgrades included with their order—our way of saying thanks for supporting the launch.
👉 Before checkout, make sure to email us for special early-bird offers.
👉 Need a custom order? Send us your specs by email and we’ll make it happen.